
Knitting Square Shawls Center Out
Before we move on to the construction of square shawls, let’s recall what we learned already as part of our course preparation:
- You know what gauge in the knitting context means and how to measure it. If not, just read my article on gauge published earlier this week as part of this course.
- You know the basic stitches of lace knitting: knit (k), purl (p), yarn over (YO), slip, slip, knit (ssk) and knit 2 together (k2tog). You can read the corresponding course article on basic lace stitches anytime.
The Anatomy of a Square Shawl
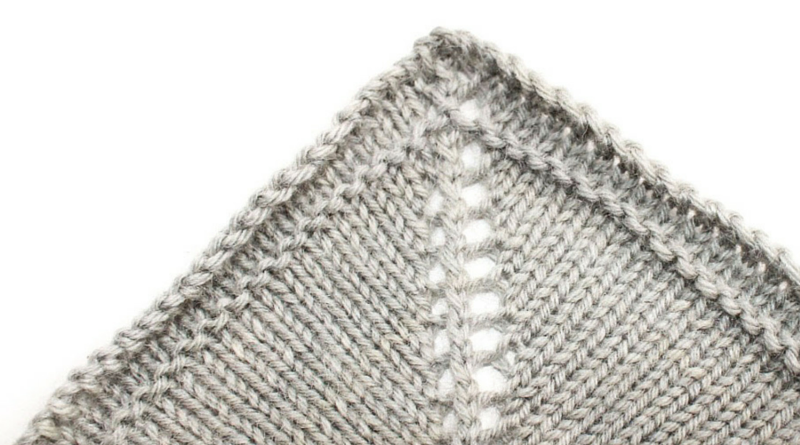
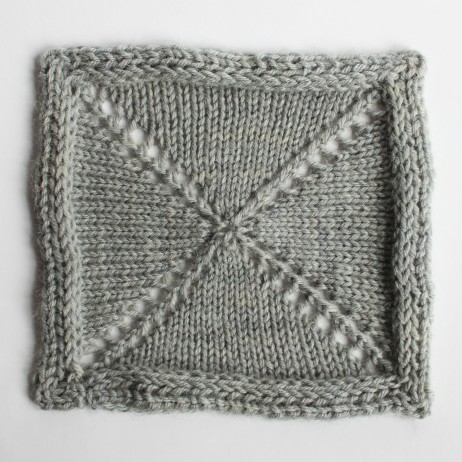
A square shawl consists of two parts: the main shawl body (shown in gray) which is always present, and eventually an edging (shown in blue). White lines represent increase positions; white dots indicate short row shaping.
As you can see in the pictures, the main shawl body of a square shawl worked from center out consists of four panels: each panel is a triangle with a 90° angle in the center and two 45° angles on the outside. The first thing we have to deal with now is therefor how to achieve the desired angles in knitting fabric.
How to Achieve Specific Angles in Shawl Shaping
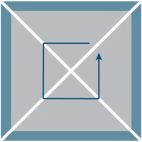
This topic is going to get its own topic next week, so for now let’s just sum up: for an approximately 90° angle you need to increase two stitches every other round (or one stitch per round – same but different). The picture below illustrates two increases every other row in each of the four panels.
The Design Process Outline for Knitting Square Shawls Center Out
Now that we know that we need to increase two stitches every other row to achieve a desired angle of 90 degree we can continue to the actual design process. The outline is as follows:
- Choose yarn and needles. Work gauge swatches until you are satisfied with the knitted fabric texture.
- Provisionally cast on 8 stitches (one stitch for each of the four panels, one for each of the four separating rows).
- Work first increase round: (YO, k1, YO, k1) 4 times. (8 + 4*2 = 16 stitches)
- Work one round stockinette.
- Repeat rounds 3-4 until your shawl is of the desired size.
- Work edging, eventually.
- Bind off all stitches loosely and block your shawl.
The Detailed Design Process
We have talked about gauge a lot already so there isn’t much to add concerning the first point in our list above.
Notes on the Provisional Cast on Method Used
The reason why I prefer to work a provisional cast on at this point is that normal cast on would cause a little hole here. Of course it could be closed when weaving in the yarn tail of the cast on edge but personally I like the result when provisionally casting on, then putting the stitches onto a live needle again in the end and pulling the yarn tail through before weaving in better. It looks neat and clean, and finishing makes all the difference as we all know. But of course this is up to you. You are the designer after all!
Why Eight Stitches?
If we only cast on four stitches we would run into problems with the very first increase round: we cannot place two yarn overs right beside each other (well we could, but this would result in a large hole instead of neat increases).
Increate Rates
Increasing two stitches every other row results in an increase of a 90° angle as desired as we have learned in the article on how to achieve desired angles in increasing and decreasing. We want to achieve a square shape from center out. A square shape has 360° in total, so with a 90° angle we need four panels as illustrated in Fig. 1.
How to Calculate the Total Number of Rows Needed for a Certain Size
We talked about gauge already. Yes, we did! The calculation is relatively easy.
We know how many rows per inch (rpi) our gauge swatch resulted in. Let’s call this number rpi. In my example below I choose
rpi = 5
We also know how large we want our shawl to become. Let’s assume we want our shawl to become one meter in side length (without edging), which equals to 100 cm or approximately 40 inches. Let’s call this side length number s, so in our example,
s = 40
So to reach a height of 40 inches, we need
40 * 5 = 200 rows
to reach a length of 40 inches. But: As we are working in the round, every round adds one row to each side of the square (we got four panels!), therefor we only need half of the rounds (yes, not rows – one round equals two rows, lengthwise!).
This means we need
200 rows = 100 rounds
To achieve the desired side length of 40 inches.
Ad 6.) Edging
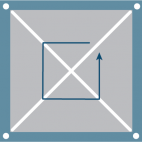
If you want to work an edging onto your shawl, you have got two options. You can either work the edging in the same manner as the main shawl body has been worked – in the round and with increases at the very same rate as the shawl body itself.
For an outline of the knitting directions in this case please see the picture below for details.

Alternatively, you can start at a certain point by casting on a certain number of stitches (how many depends on your gauge and the desired width of the edging), working the edging sideways. In this case, for every other row of the edging worked (for an outline of the knitting directions please see Fig. 3) one shawl body stitch is worked together with the edging.
The two pictures below illustrate the difference between the two methods of knitting the edging: the first shows the first method (knitting in the same direction as the shawl itself), the other one shows an edging worked sideways.
Do you spot the difference in the knitting direction with the edging in the two pictures above? The resulting look & feel is very different!

Love it! There’s one thing I’m confused about: in the knitting instructions, lines 3-4 should be repeated. But line 3 doesn’t create 4 panels, but rather infinitely doubles [1 YO 1 k]. Shouldn’t there be 4 sections where we actually do a growing number of k’s, to make 4 triangular panel? I expected a 1k, then 3k, then 5k etc.
What am I missing. I’m a beginner, that’s an important disclaimer! 😀
Thank you!
Pingback: Shawl Design for Everybody - Your Free Shawl Design Online Course
Pingback: 365 Days of Shawl Knitting - knitting.today
Thank you for sharing your wealth of information. I love reading your post!
My pleasure! I love hearing your feedback 🙂
Pingback: Shawl Design for Everybody - Your Free Shawl Design Online Course